
When a new plastic part reaches the quotation stage, one of the first questions is usually:
How much will the injection mold cost?
There is no useful standard answer without first looking at the part itself.
Two plastic housings can be almost the same size and still require very different molds. One may use a straightforward two-plate structure. The other may contain side openings, internal hooks, deep ribs, tight assembly dimensions, or cosmetic surfaces that limit where gates and ejector pins can be placed.
From the outside, the two parts may not look very different. From a tooling perspective, they can be completely different projects.
That is why injection mold cost should not be estimated from part size alone.
During a tooling review, the more important questions are often:
- How will the cavity be filled?
- Can the part release in the normal mold-opening direction?
- Are side actions required?
- Which dimensions are actually critical?
- What plastic material will be molded?
- How many parts will the tool need to produce?
- What happens to the molded part during final assembly?
These details affect mold design, machining, fitting, mold trials, maintenance, and eventually the final tooling price.
Below are eight factors that usually have the greatest influence on injection mold cost.
1. Part Geometry Often Matters More Than Part Size
A large plastic part normally requires a larger mold base, more steel, and a larger injection molding machine.
But size is only one part of the cost.
A relatively small component can be more expensive to tool if its geometry is difficult to machine or difficult to release from the mold.
When reviewing a 3D model, several areas deserve attention:
- deep cavities;
- narrow ribs;
- screw bosses;
- side holes;
- snap features;
- thin sections;
- internal recesses;
- difficult parting areas;
- deep vertical walls.
A rectangular plastic enclosure is a good example.
The outside may look very simple. Once the model is opened, the inside may contain PCB supports, screw bosses, reinforcing ribs, connector openings, locating features, and several locking clips.
Those internal features often have a greater effect on tooling complexity than the external appearance.
Machining access also matters
Not every surface can be machined in the same way.
Some areas are easy to reach with CNC milling. Other details may require EDM, separate inserts, additional electrodes, or more fitting work.
A deep narrow rib, for example, can look insignificant in the CAD model but be much more difficult to manufacture accurately than a large open surface.
This is one reason why a product photo or overall dimensions are usually not enough for an accurate mold quotation.
The 3D model reveals much more about the real manufacturing difficulty.
For this reason, part geometry is one of the first variables we consider when estimating injection mold cost.
For a broader engineering perspective, the Society of Plastics Engineers also discusses how part design, material selection, mold construction, and the molding process need to be considered together when evaluating manufacturability and cost.
2. Undercuts Can Change the Entire Mold Structure
Undercut design is one of the first things that should be checked during DFM.
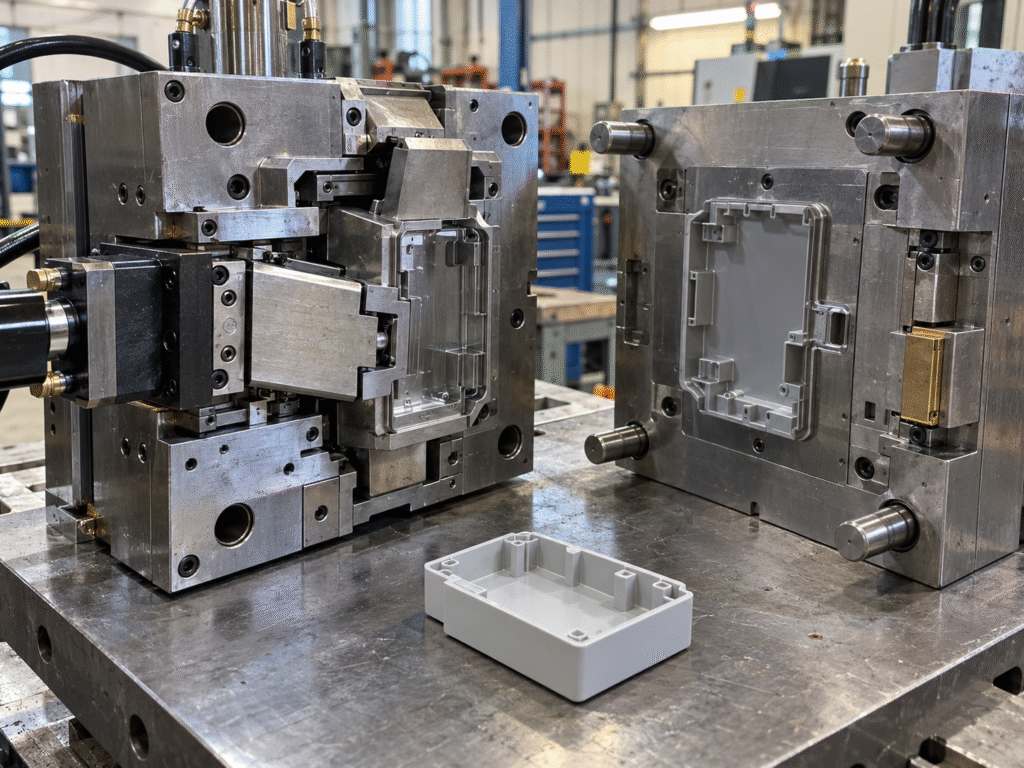
A small undercut can sometimes change a simple mold into a tool with several moving mechanisms.
Typical examples include:
- side holes;
- hooks;
- recessed openings;
- side-facing clips;
- locking features;
- internal snap structures.
If one of these features prevents the molded part from moving directly in the mold-opening direction, another release method may be required.
But an undercut does not automatically mean that a slider must be added.
First check whether the feature can be simplified
Before deciding the mold structure, several questions should be considered:
- Can the feature direction be changed?
- Can the parting line be adjusted?
- Can the snap geometry be redesigned?
- Can the feature be opened from another direction?
- Is limited flexible release possible with the selected material?
The answer depends on the part geometry, material, wall thickness, and functional requirement.
If the undercut cannot be removed, the mold may need:
- a slider;
- a lifter;
- an angled core;
- a hydraulic core pull;
- another special release mechanism.
Adding one of these mechanisms affects more than the price of one extra component.
It can change:
- mold dimensions;
- mold base selection;
- steel machining;
- guide components;
- cooling layout;
- fitting work;
- mold assembly;
- maintenance requirements.
This is where early DFM can make a real difference.
Sometimes a small change to a clip, side hole, or locking feature removes an entire side action from the mold.
Changing the CAD model before tooling starts is usually much easier than simplifying the mold after the structure has already been approved.
3. Cavity Number Should Match the Production Plan
Cavity number has a direct effect on both tooling investment and production capacity.
A single-cavity mold produces one part during each molding cycle.
A multi-cavity mold produces several identical parts at the same time.
It may seem logical to choose as many cavities as possible, but that is not always the best decision.
For a product with relatively low annual demand, a single-cavity or two-cavity tool may already provide enough capacity.
Building a four-cavity or eight-cavity mold for a project with limited demand can increase the tooling investment without providing much practical benefit.
The calculation changes when the expected volume is much higher.
A single-cavity mold may be cheaper to build, but it requires more molding cycles and more machine hours to produce the same total quantity.
For a stable high-volume project, the additional investment in a multi-cavity tool may reduce the manufacturing cost over time.
Cavity quantity should be reviewed together with:
- annual volume;
- total expected program volume;
- required delivery schedule;
- molding cycle time;
- part dimensions;
- machine capacity;
- tooling budget.
There is another point that is easy to overlook.
A multi-cavity mold is not simply several copies of the same cavity placed into one mold base.
The cavities also need to behave consistently.
Runner balance, cooling, filling, and cavity-to-cavity dimensions become more important as the number of cavities increases.
For this reason, the right question is not:
Which mold has the lowest initial price?
A better question is:
Which cavity configuration makes sense for the expected production volume?
For this reason, production volume should always be considered when evaluating injection mold cost. A cavity plan that matches the real demand helps keep injection mold cost aligned with the production target rather than simply minimizing the initial tooling price.
4. Mold Steel Should Match Tool Life and Material
Mold steel is another visible part of the tooling quotation.
However, choosing mold steel is not simply a matter of selecting the highest grade available.
The correct choice depends on what the tool is expected to do.
Before steel is selected, several project conditions should be clear:
- expected annual production;
- total tool life requirement;
- plastic material;
- glass-fiber content;
- surface finish;
- corrosion requirements;
- wear conditions.
A mold expected to produce a relatively limited number of parts may not require the same steel specification as a tool that will run continuously for several years.
The resin also matters.
Glass-filled materials, for example, can increase wear around gates, cavity surfaces, and moving components.
Some materials or operating environments may require better corrosion resistance.
Highly polished cosmetic surfaces may also affect steel selection.
Different areas of one mold may need different materials
The mold base, cavity insert, core insert, and a high-wear insert do not necessarily need to use exactly the same grade of steel.
Sometimes a local insert can be upgraded instead of increasing the specification of the entire mold.
That can be a more practical way to balance durability and cost.
The goal is not to build the most expensive mold possible.
It is to select materials that are appropriate for the expected production life and molding conditions.
Steel selection can therefore have a noticeable effect on injection mold cost, especially for long-life tools or abrasive resins.
5. Tight Tolerances Should Be Used Where They Actually Matter
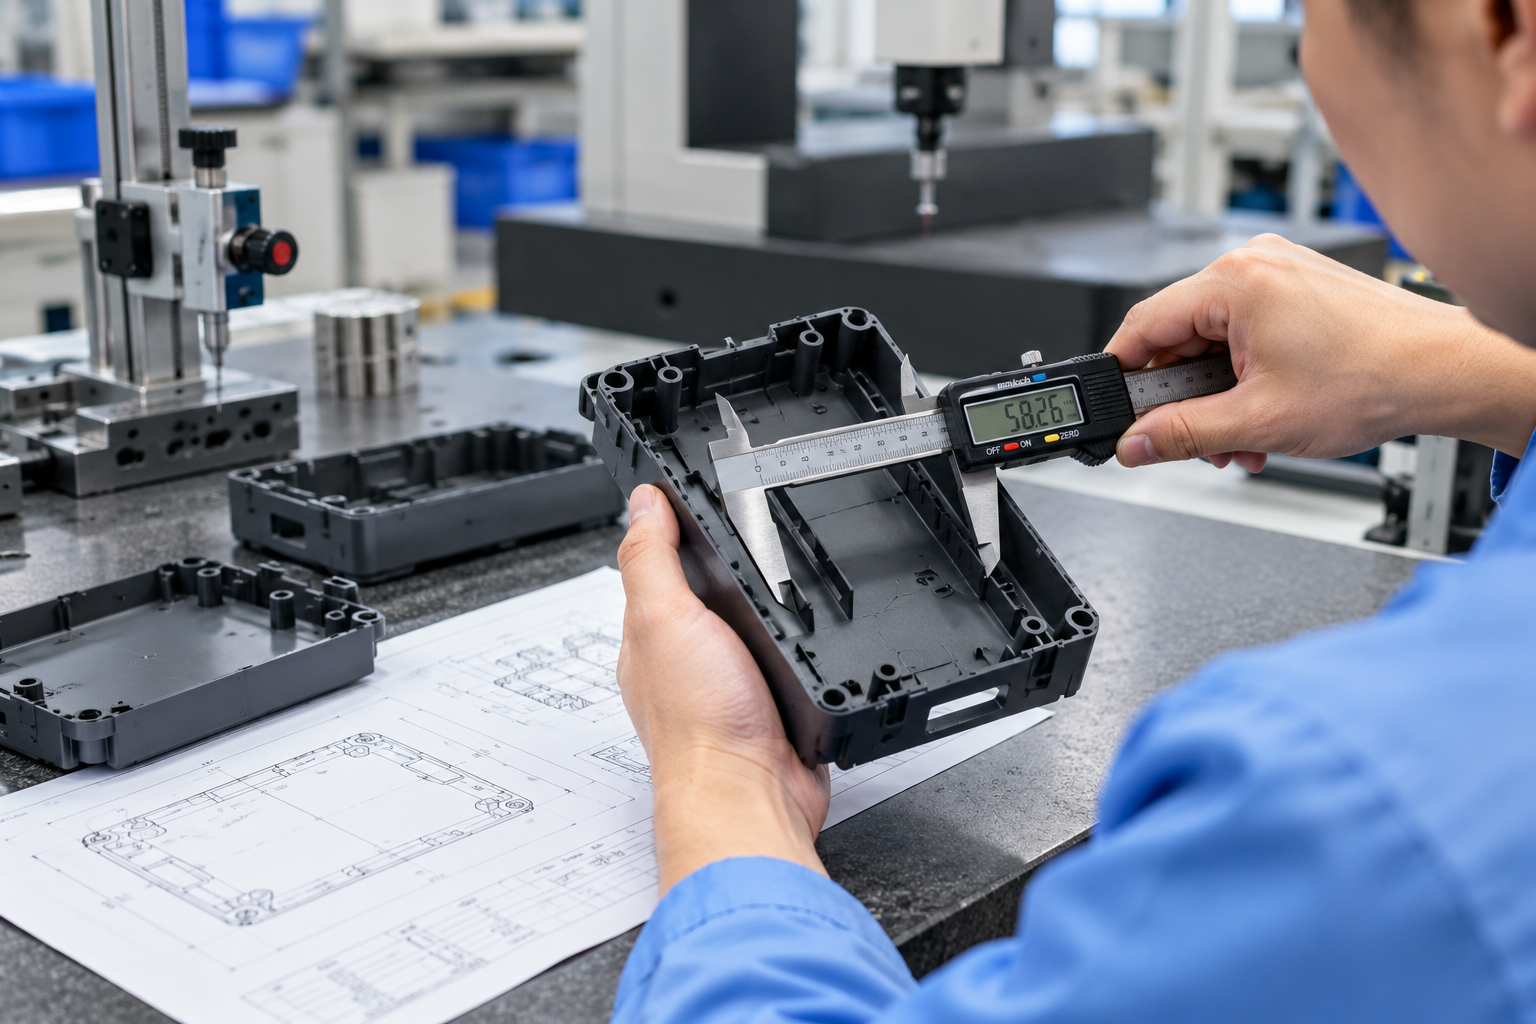
Tight tolerances can increase tooling cost, but the bigger issue is often how those tolerances are applied.
In some drawings, many dimensions are given very tight limits even though only a small number of them directly affect product function.
For an assembled plastic enclosure, not every dimension has the same importance.
Some dimensions may control:
- PCB position;
- screw boss alignment;
- connector openings;
- button position;
- display alignment;
- sealing surfaces;
- upper and lower housing fit.
These are usually more important than a non-functional outer dimension that does not affect assembly or appearance.
Why excessive tolerances increase tooling work
When too many dimensions are treated as critical, the project may require:
- tighter mold machining;
- more EDM work;
- additional fitting;
- more detailed measurement;
- repeated mold adjustment;
- additional sampling.
It can also complicate T1 evaluation.
If every dimension is treated with the same level of importance, it becomes harder to focus on the features that actually determine whether the product will assemble and function correctly.
This is why tolerance review should be connected to product function.
For a housing that will later contain a PCB, button, display, connector, or another molded component, assembly information is especially useful during DFM.
A molded part can look acceptable by itself and still create problems when the full product is assembled.
Unnecessary tight tolerances can increase injection mold cost without improving the actual function of the part. Defining which dimensions are truly critical helps control injection mold cost while keeping attention on the features that affect assembly and performance.
6. Cosmetic Requirements Can Add Hidden Tooling Restrictions
A visible product housing and an internal plastic bracket should not be treated in exactly the same way during mold design.
For a cosmetic enclosure, the mold has to control more than dimensions.
The tooling team may also need to consider:
- polishing;
- texture;
- parting-line position;
- gate location;
- ejector pin location;
- weld-line position;
- sink marks;
- flow marks;
- surface scratches.
These requirements can reduce the number of practical mold design options.
Consider the front surface of a consumer or industrial enclosure.
If the customer does not accept a visible gate mark, ejector mark, or weld line in that area, the mold designer must find another location.
That decision can influence the gate design, flow direction, ejection system, and even the parting line.
Texture can also affect mold release
Texture is not only a cosmetic specification.
It can change the way a plastic surface releases from the cavity.
A deep texture on a nearly vertical surface can require more draft than a polished surface.
If the draft is insufficient, the part may drag against the mold during ejection.
For this reason, cosmetic requirements should be confirmed before the mold structure is finalized.
If a major appearance requirement is introduced only after T1, correcting it may require much more work.
For appearance-critical housings, these restrictions can become a meaningful part of injection mold cost. The earlier cosmetic requirements are confirmed, the easier it is to estimate injection mold cost without leaving major appearance-related changes until after T1.
7. Hot Runner and Cold Runner Affect More Than Initial Tooling Price
Hot runner and cold runner systems are often compared only by tooling price.
That does not show the full picture.
A cold runner mold is generally simpler and normally requires a lower initial investment.
The runner solidifies together with the molded part and is removed after molding.
For many projects, this is a practical solution.
However, the runner also consumes material.
When production volume is high or the resin itself is expensive, runner waste may become a more important part of the cost calculation.
A hot runner mold requires a higher initial investment.
The mold contains additional components and requires temperature control, wiring, and more maintenance.
But in the right application, it can reduce runner waste and support a suitable multi-cavity production strategy.
The decision should consider:
- resin cost;
- production volume;
- part weight;
- cavity number;
- cycle requirements;
- maintenance;
- automation requirements.
A hot runner is not automatically a better choice.
A cold runner is not automatically an inferior choice.
The appropriate system depends on the economics and production requirements of the actual project.
8. Mold Trials and Modification Are Part of the Real Tooling Cost
Tooling does not end when machining is finished.
The mold still needs to be:
- assembled;
- fitted;
- installed in the molding machine;
- sampled;
- inspected;
- adjusted.
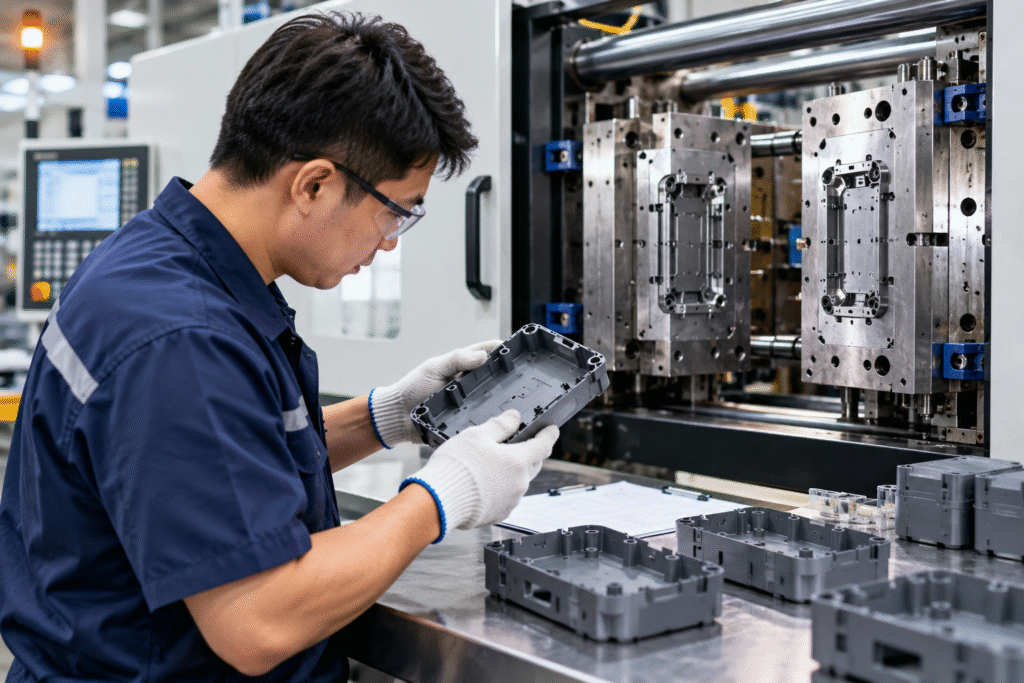
The first mold trial, commonly referred to as T1, is an important stage because it shows how the complete tool behaves under actual molding conditions.
At T1, the question is not simply:
Did the mold produce a plastic part?
The engineering team also needs to look at:
- filling behavior;
- ejection;
- flash;
- short shots;
- sink marks;
- weld lines;
- warpage;
- important dimensions;
- slide and lifter movement;
- cooling;
- assembly fit.
The first samples often reveal details that could not be confirmed completely from CAD alone.
Some molds need only minor adjustment.
Other tools may require:
- local steel correction;
- venting changes;
- polishing;
- dimension modification;
- gate adjustment;
- another mold trial.
For that reason, a mold quotation should be reviewed together with the actual scope of work.
It is useful to understand whether the quotation includes:
- T1 sampling;
- dimensional inspection;
- modification rounds;
- additional trials;
- sample quantity;
- final mold documentation.
A lower initial number does not necessarily represent the complete tooling investment if important trial or validation work is excluded.
Mold trial and modification scope should therefore be included when comparing total injection mold cost. A realistic injection mold cost should reflect not only steel and machining, but also the trial and correction work needed to bring the tool into stable production.
For additional technical background on how mold design influences filling, cooling, cycle efficiency, part dimensions, and molded-part performance, see Covestro’s mold design guide.
Why Two Injection Mold Quotations Can Be Very Different
It is common for a buyer to send the same 3D model to several mold makers and receive very different prices.
At first glance, it may seem that one supplier is simply expensive.
That is not always the reason.
Two suppliers may be quoting different mold specifications.
For example, their quotations may be based on different:
- mold steels;
- mold bases;
- tool-life expectations;
- cavity quantities;
- runner systems;
- slider or lifter structures;
- standard components;
- spare parts;
- trial arrangements;
- inspection requirements;
- export mold standards.
One quotation may be based on a relatively simple mold intended for limited production.
Another may be based on a tool designed for a longer production life with upgraded steel, different components, or more validation work.
Both documents may say “injection mold,” but technically they may describe very different tools.
Before comparing the final price, it is better to align the main specifications first.
Otherwise, the lowest number may not represent the lowest total cost for the project.
How DFM Can Reduce Mold Cost Before Tooling Starts
One of the best times to control tooling cost is before mold manufacturing begins.
During a DFM review, changes can still be made in the 3D model instead of in finished mold steel.
A DFM review may identify opportunities such as:
- removing an unnecessary undercut;
- changing the direction of a snap feature;
- simplifying a side action;
- improving wall-thickness transitions;
- adjusting a boss structure;
- adding suitable draft;
- changing the parting line;
- relaxing a non-critical tolerance.
Not every DFM recommendation is made to reduce the mold price.
Some changes are intended to improve:
- filling;
- ejection;
- dimensional stability;
- surface quality;
- assembly reliability.
But if a feature creates a complicated mold structure without adding real functional value to the product, changing it before tooling starts can avoid unnecessary cost.
A relatively small CAD change before machining is usually much easier to manage than a major mold modification after T1.
What Information Helps Us Prepare a More Accurate Mold Quote?
The quality of a mold quotation depends partly on the information available at the beginning.
For a new injection molded component, useful project information normally includes:
- 3D CAD file;
- 2D drawing, if available;
- plastic material;
- annual production volume;
- expected total program volume;
- surface finish or texture;
- critical dimensions;
- cosmetic requirements;
- assembly requirements;
- special inspection or testing requirements.
For plastic housings, it is also useful to understand what will be installed inside the enclosure.
This may include:
- PCB assemblies;
- connectors;
- buttons;
- displays;
- cables;
- antennas;
- sensors;
- screws;
- inserts.
These components can affect the importance of individual plastic dimensions.
For example, a small change in the position of a screw boss may influence PCB alignment.
A slight shift in a connector opening may prevent the connector from sitting correctly in the final housing.
A dimensional issue that looks minor when inspecting the plastic part alone can become much more important during assembly.
Providing this information earlier helps connect mold design with the complete product rather than treating the molded component as an isolated part.
Injection Mold Cost Should Be Evaluated Over the Full Production Life
Tooling price is an important part of a new project, but it should not be viewed only as a one-time purchasing cost.
After T1, the mold still needs to support repeatable production.
Over its working life, mold design can affect:
- part consistency;
- cycle time;
- mold maintenance;
- production downtime;
- scrap;
- dimensional stability;
- surface quality;
- assembly fit.
A mold that is inexpensive to build but difficult to run consistently may create additional cost later.
At the same time, specifying a much more expensive mold than the project actually needs may not provide a practical return.
The target should be a mold structure that matches the part, the material, the expected production volume, and the required product life.
For many projects, that process begins before any steel is cut:
DFM → Mold Design → Tooling → Mold Trial → Injection Molding → Assembly
Looking at these stages together provides a more realistic picture of injection mold cost.
Conclusion: Look Beyond the Initial Mold Price
Injection mold cost is influenced by much more than the physical size of a plastic part.
Part geometry, undercuts, cavity number, mold steel, tolerances, cosmetic requirements, runner design, and mold validation can all change the final tooling investment.
More importantly, those decisions continue to affect the project after the mold has been built.
A suitable mold should support stable molding, consistent part quality, reasonable maintenance, and reliable downstream assembly.
This is why the 3D model, plastic material, production volume, critical dimensions, surface requirements, and assembly information should ideally be reviewed before the final mold structure is confirmed.
In many projects, some of the most useful cost improvements happen during DFM, while the design can still be changed relatively easily.
For buyers comparing mold quotations, the goal should therefore not be to compare the final number alone.
The more useful question is:
Does the proposed mold structure match the actual production requirement?
At CINDY MOULD, we support projects from DFM and mold design through tooling, injection molding, and product assembly.
If you are preparing a new injection molded part, you can send us your 3D files, material requirements, expected production volume, and assembly information for manufacturing review and quotation.
FAQ
How much does an injection mold cost?
There is no standard price that applies to every injection mold. The final cost depends on part geometry, mold structure, cavity number, mold steel, surface requirements, tolerances, plastic material, production volume, and validation requirements.
Why can two mold quotations for the same plastic part be very different?
The two suppliers may be quoting different mold specifications. Mold steel, cavity quantity, expected tool life, runner system, side actions, spare parts, inspection scope, and mold trial requirements should be compared before judging the final price.
Can DFM reduce injection mold cost?
In some projects, yes. DFM may identify unnecessary undercuts, complex release features, excessive tolerances, or other details that increase mold complexity. DFM is also used to improve filling, ejection, dimensional stability, and assembly—not only to reduce cost.
What information is needed for an accurate injection mold quotation?
A 3D CAD file is usually the most useful starting point. A 2D drawing, plastic material, expected production volume, surface finish, critical dimensions, cosmetic requirements, and assembly information can make the quotation more accurate and reduce assumptions during mold design.